Building an energy dashboard
Written on Friday, 29 May 2026 at 22:00. Last Modified on Wednesday, 24 June 2026 at 22:00.
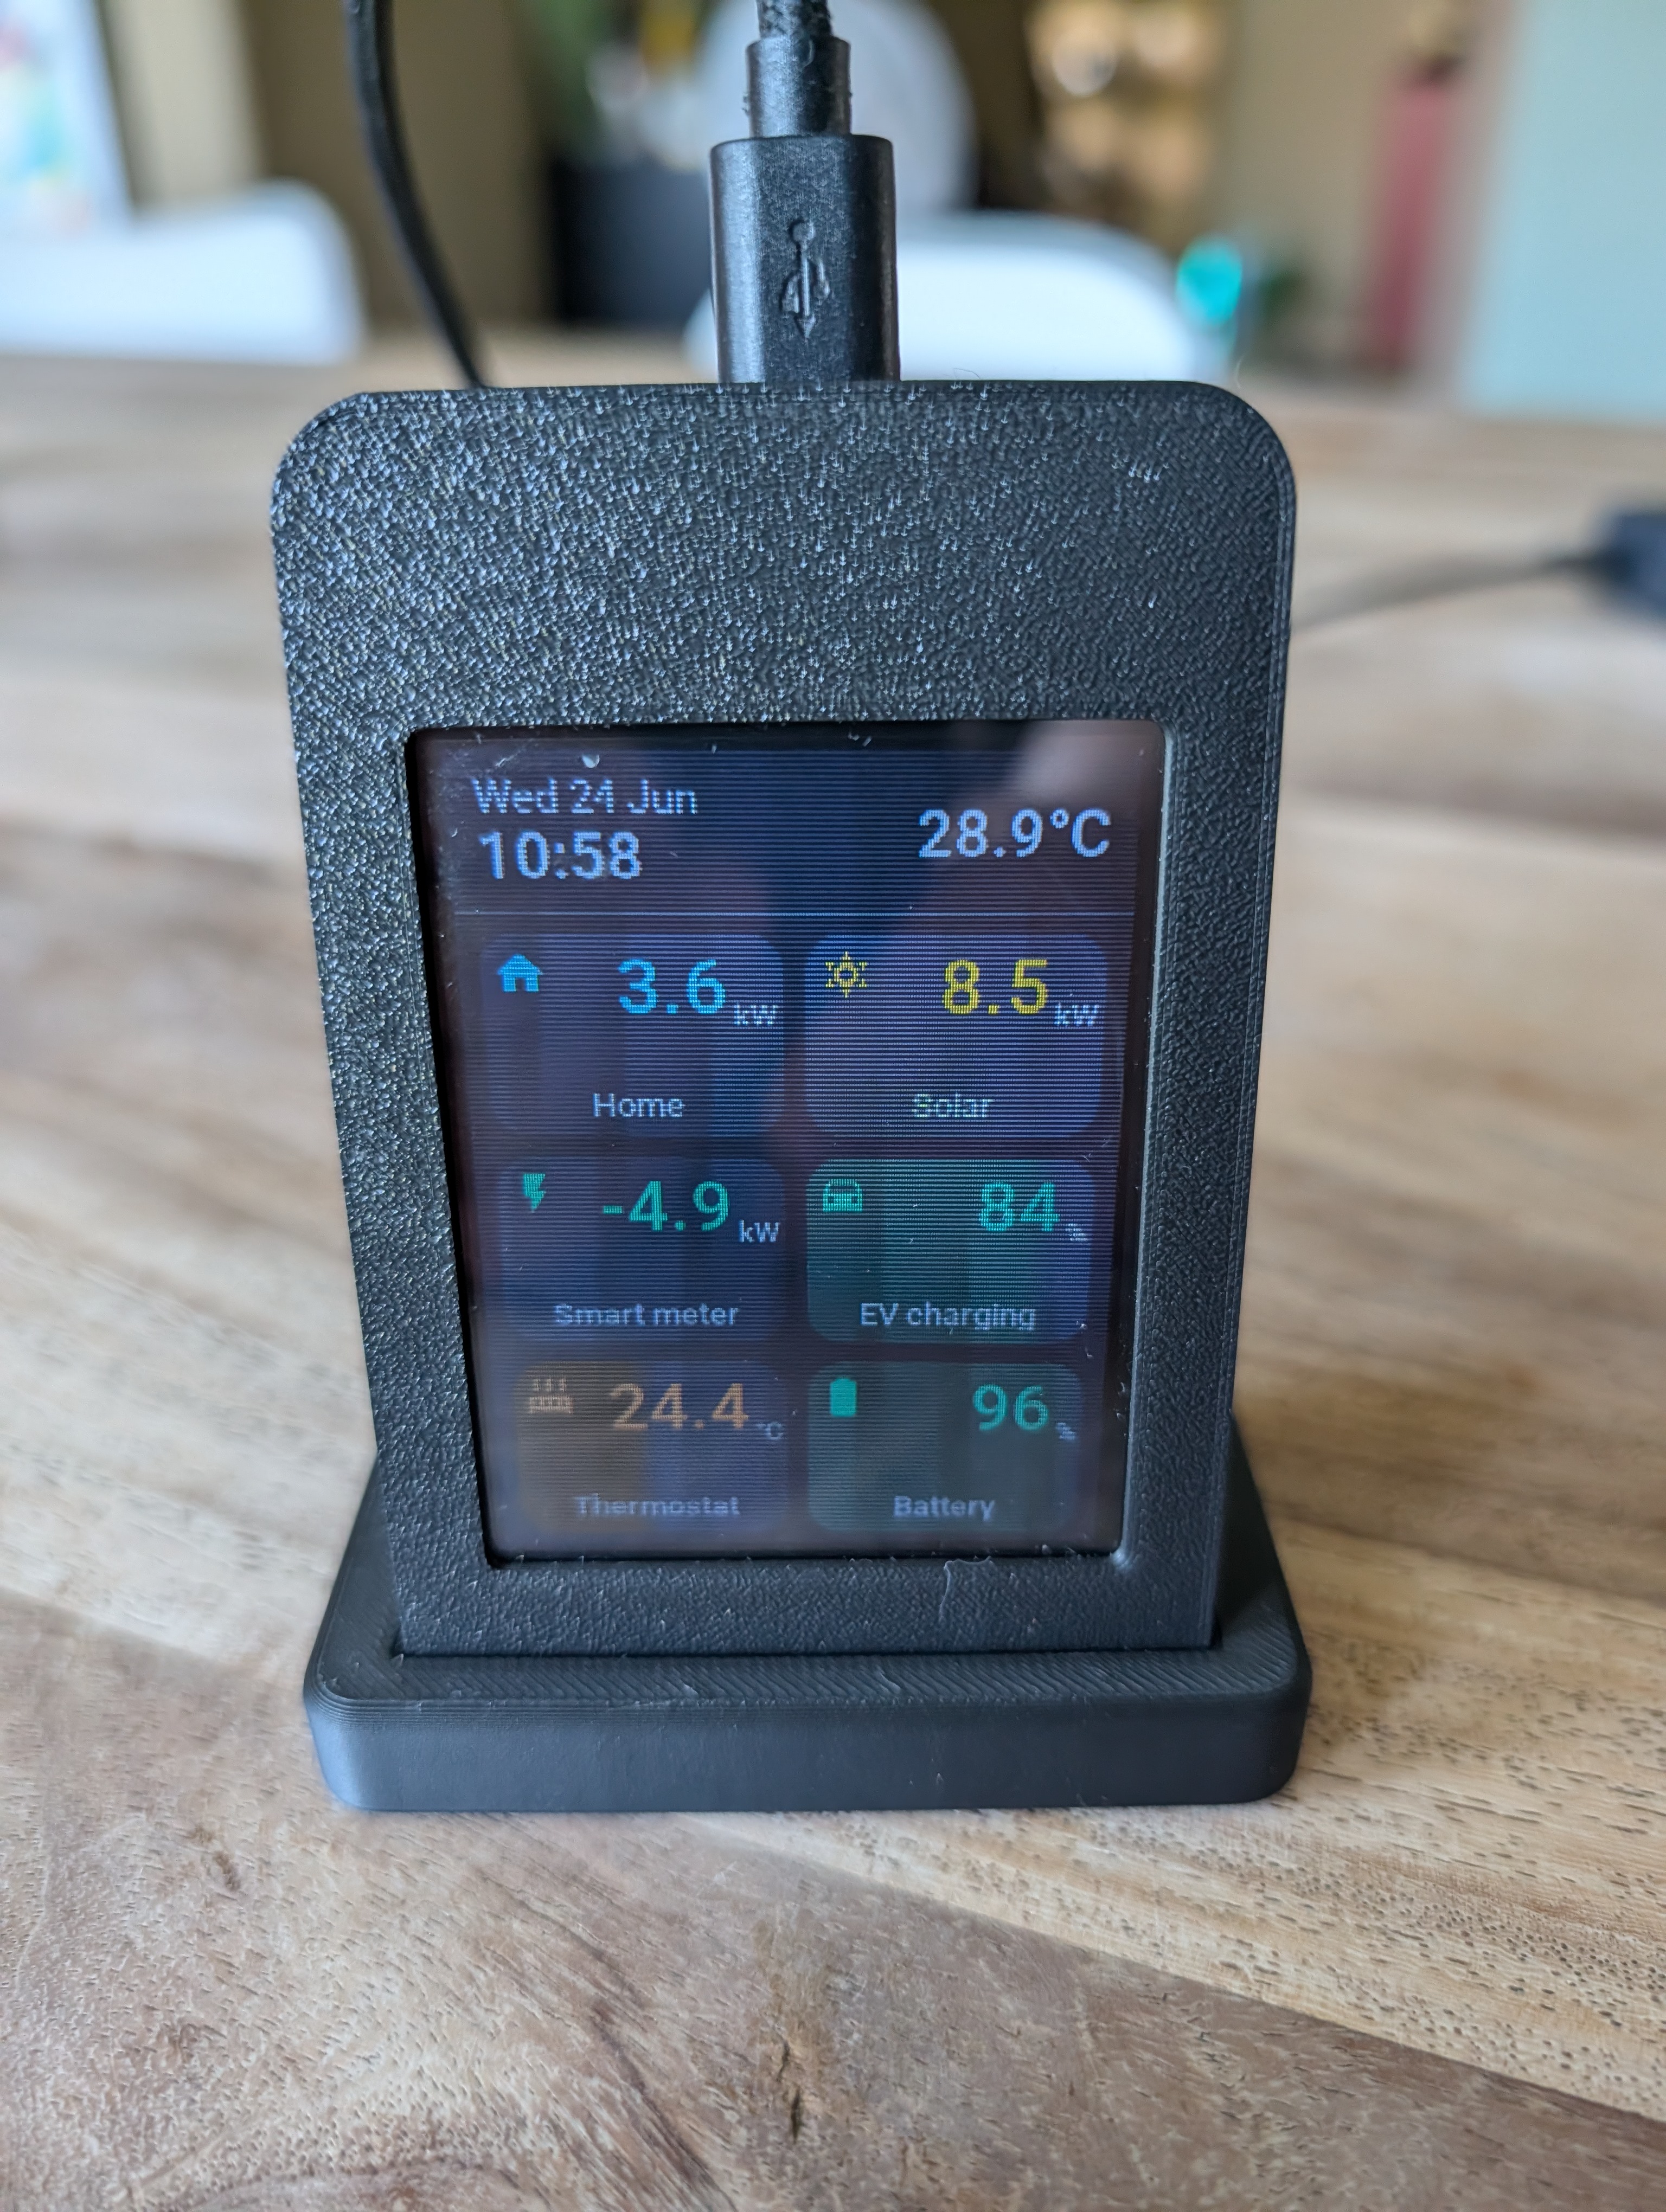
I've build a tiny energy dashboard that connects to my Home Assistant. Why? As I'm building my bespoke EMS in Home Assistant, which basically optimizes my heat pump, curtails solar panels (zero grid export) and optimally charges my plug-in battery, I often feel the need to have a look if everything is going well. Until today, I would pick up my phone and probably let my mind wanter off to other non-important things.
I actually built this dashboard twice, on two very different bits of hardware. Below are both builds side by side, so you can pick whichever fits your taste.
Build 1 — Nextion NX3224F028
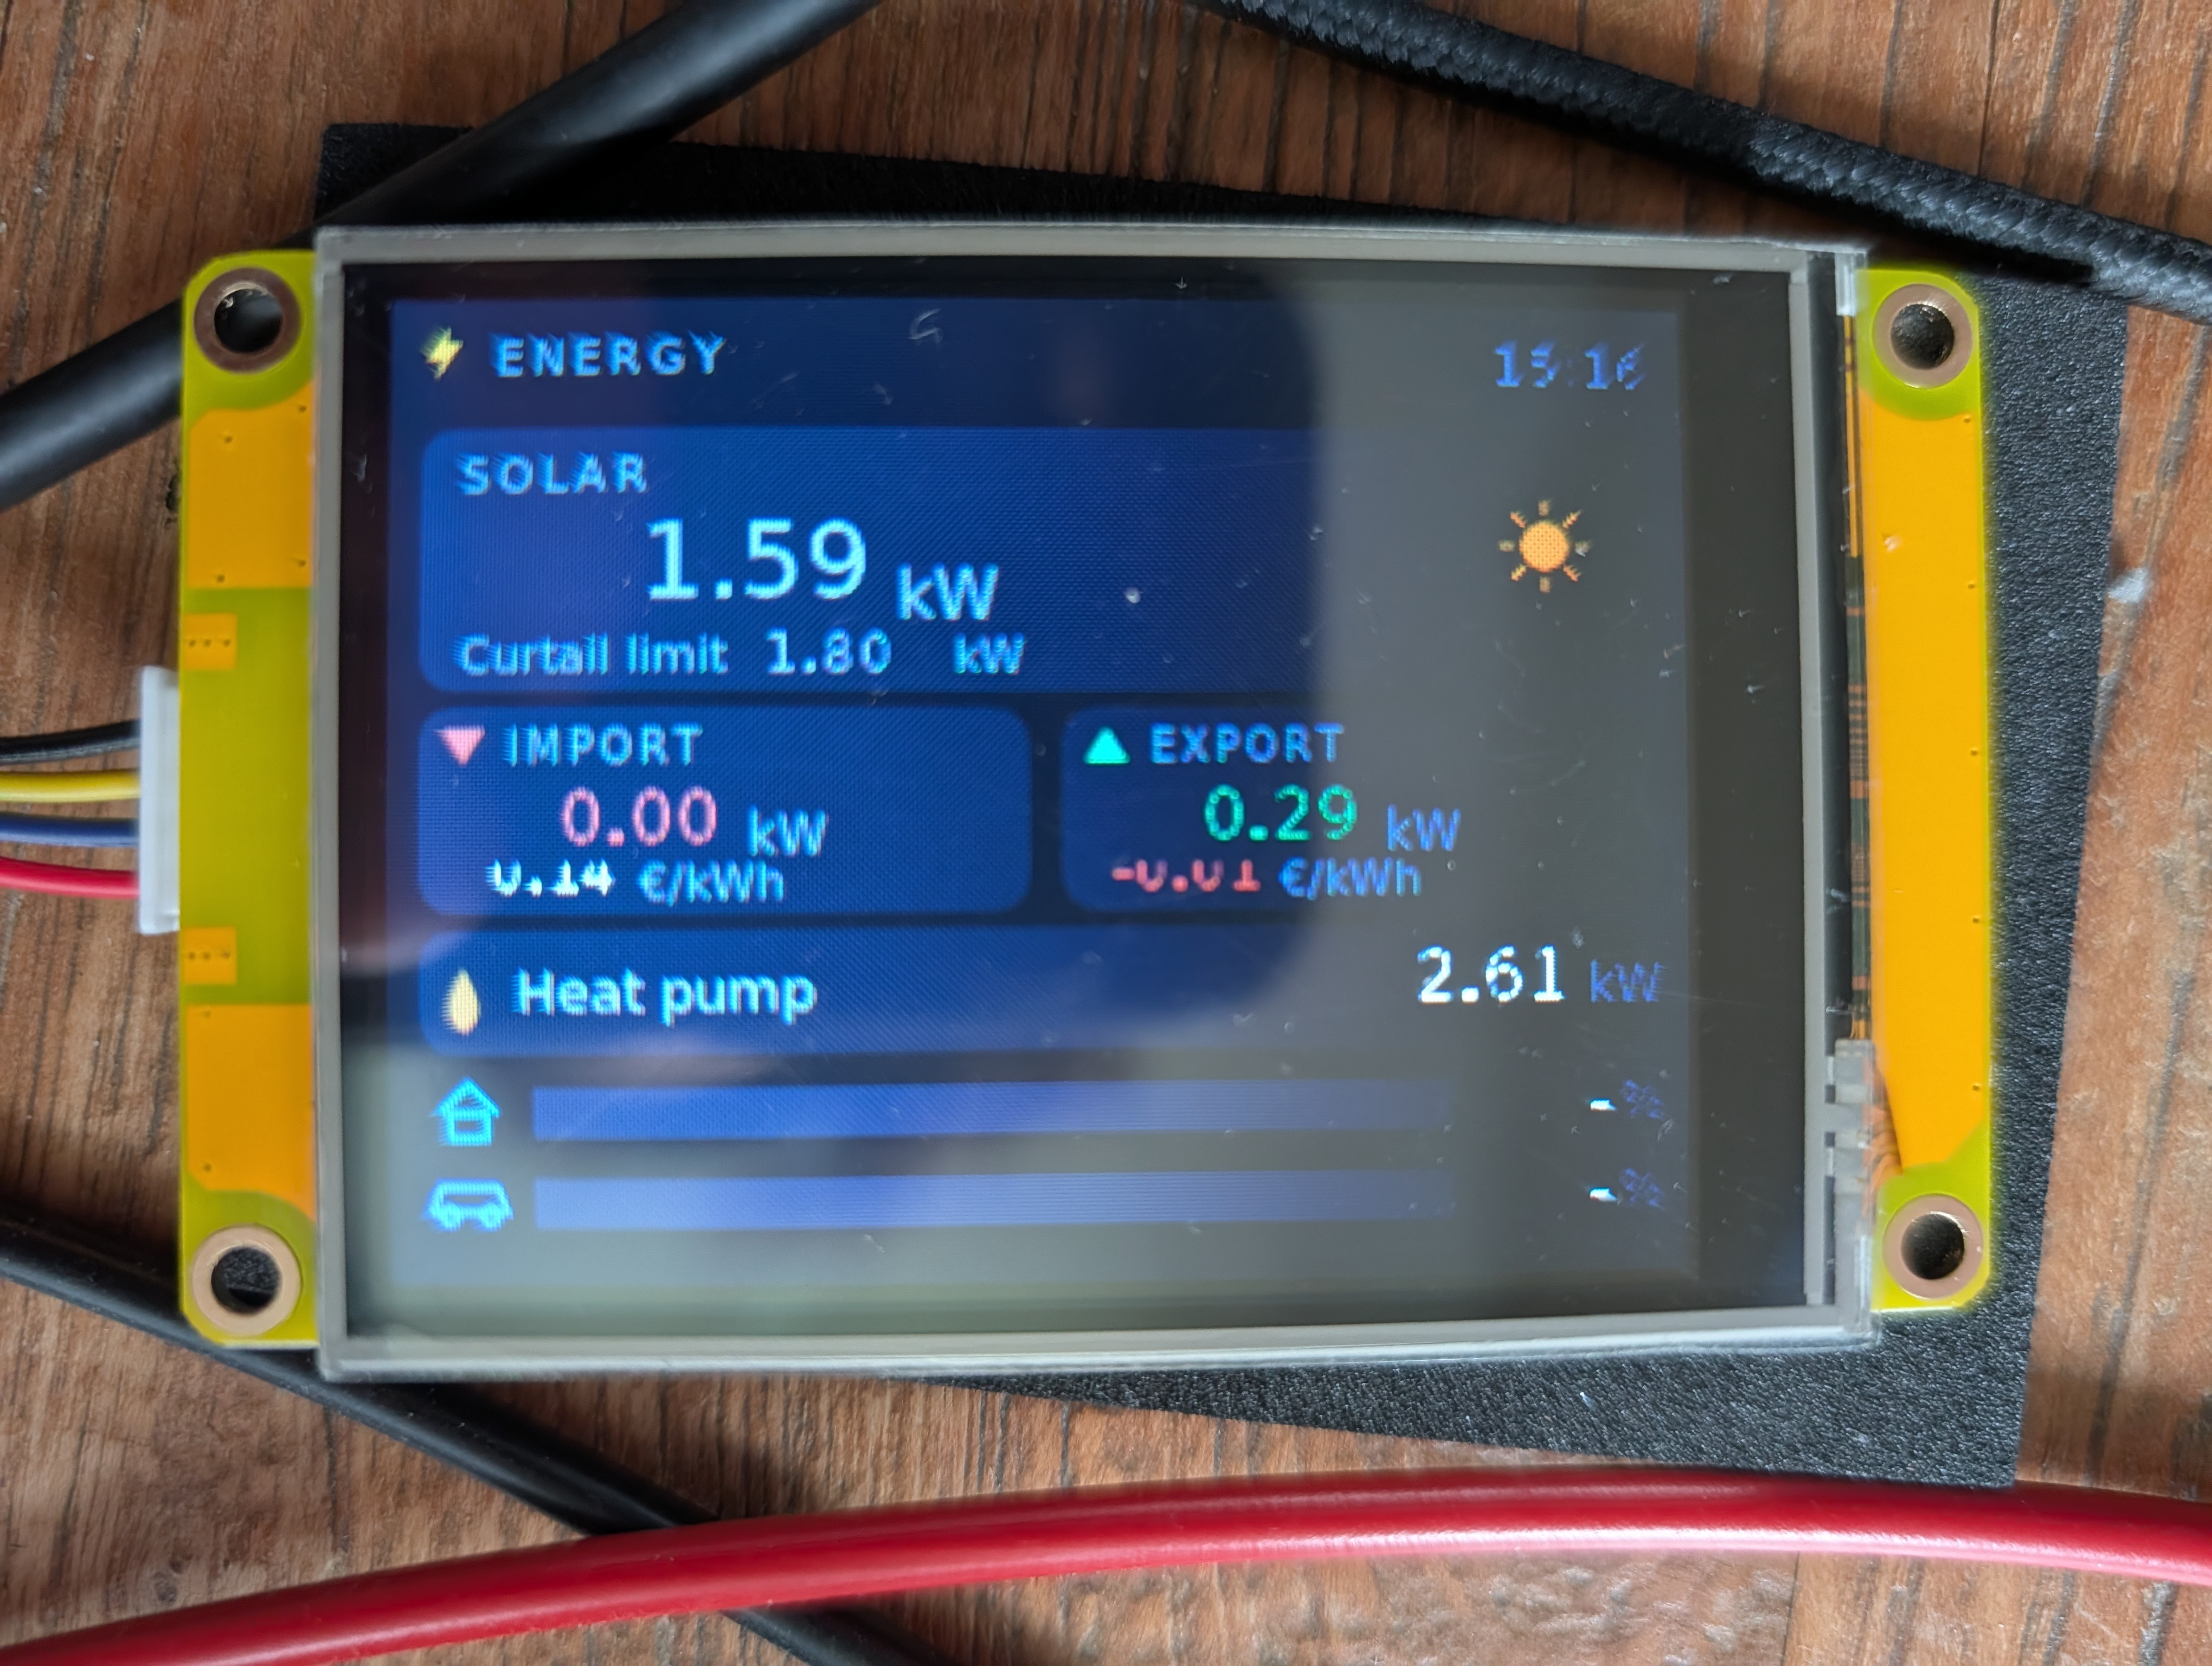
It's been a while that I wanted to experiment with a CYD and ideally learn LVGL. But while looking at the performance of a CYD running LVGL, I decided to first try out a Nextion TFT HMI Display Discovery NX3224F028 (2.8"). The Nextion is an "HMI" display: it runs its own little firmware and you design the UI in a dedicated editor, so the host microcontroller only sends values over serial.
Hardware
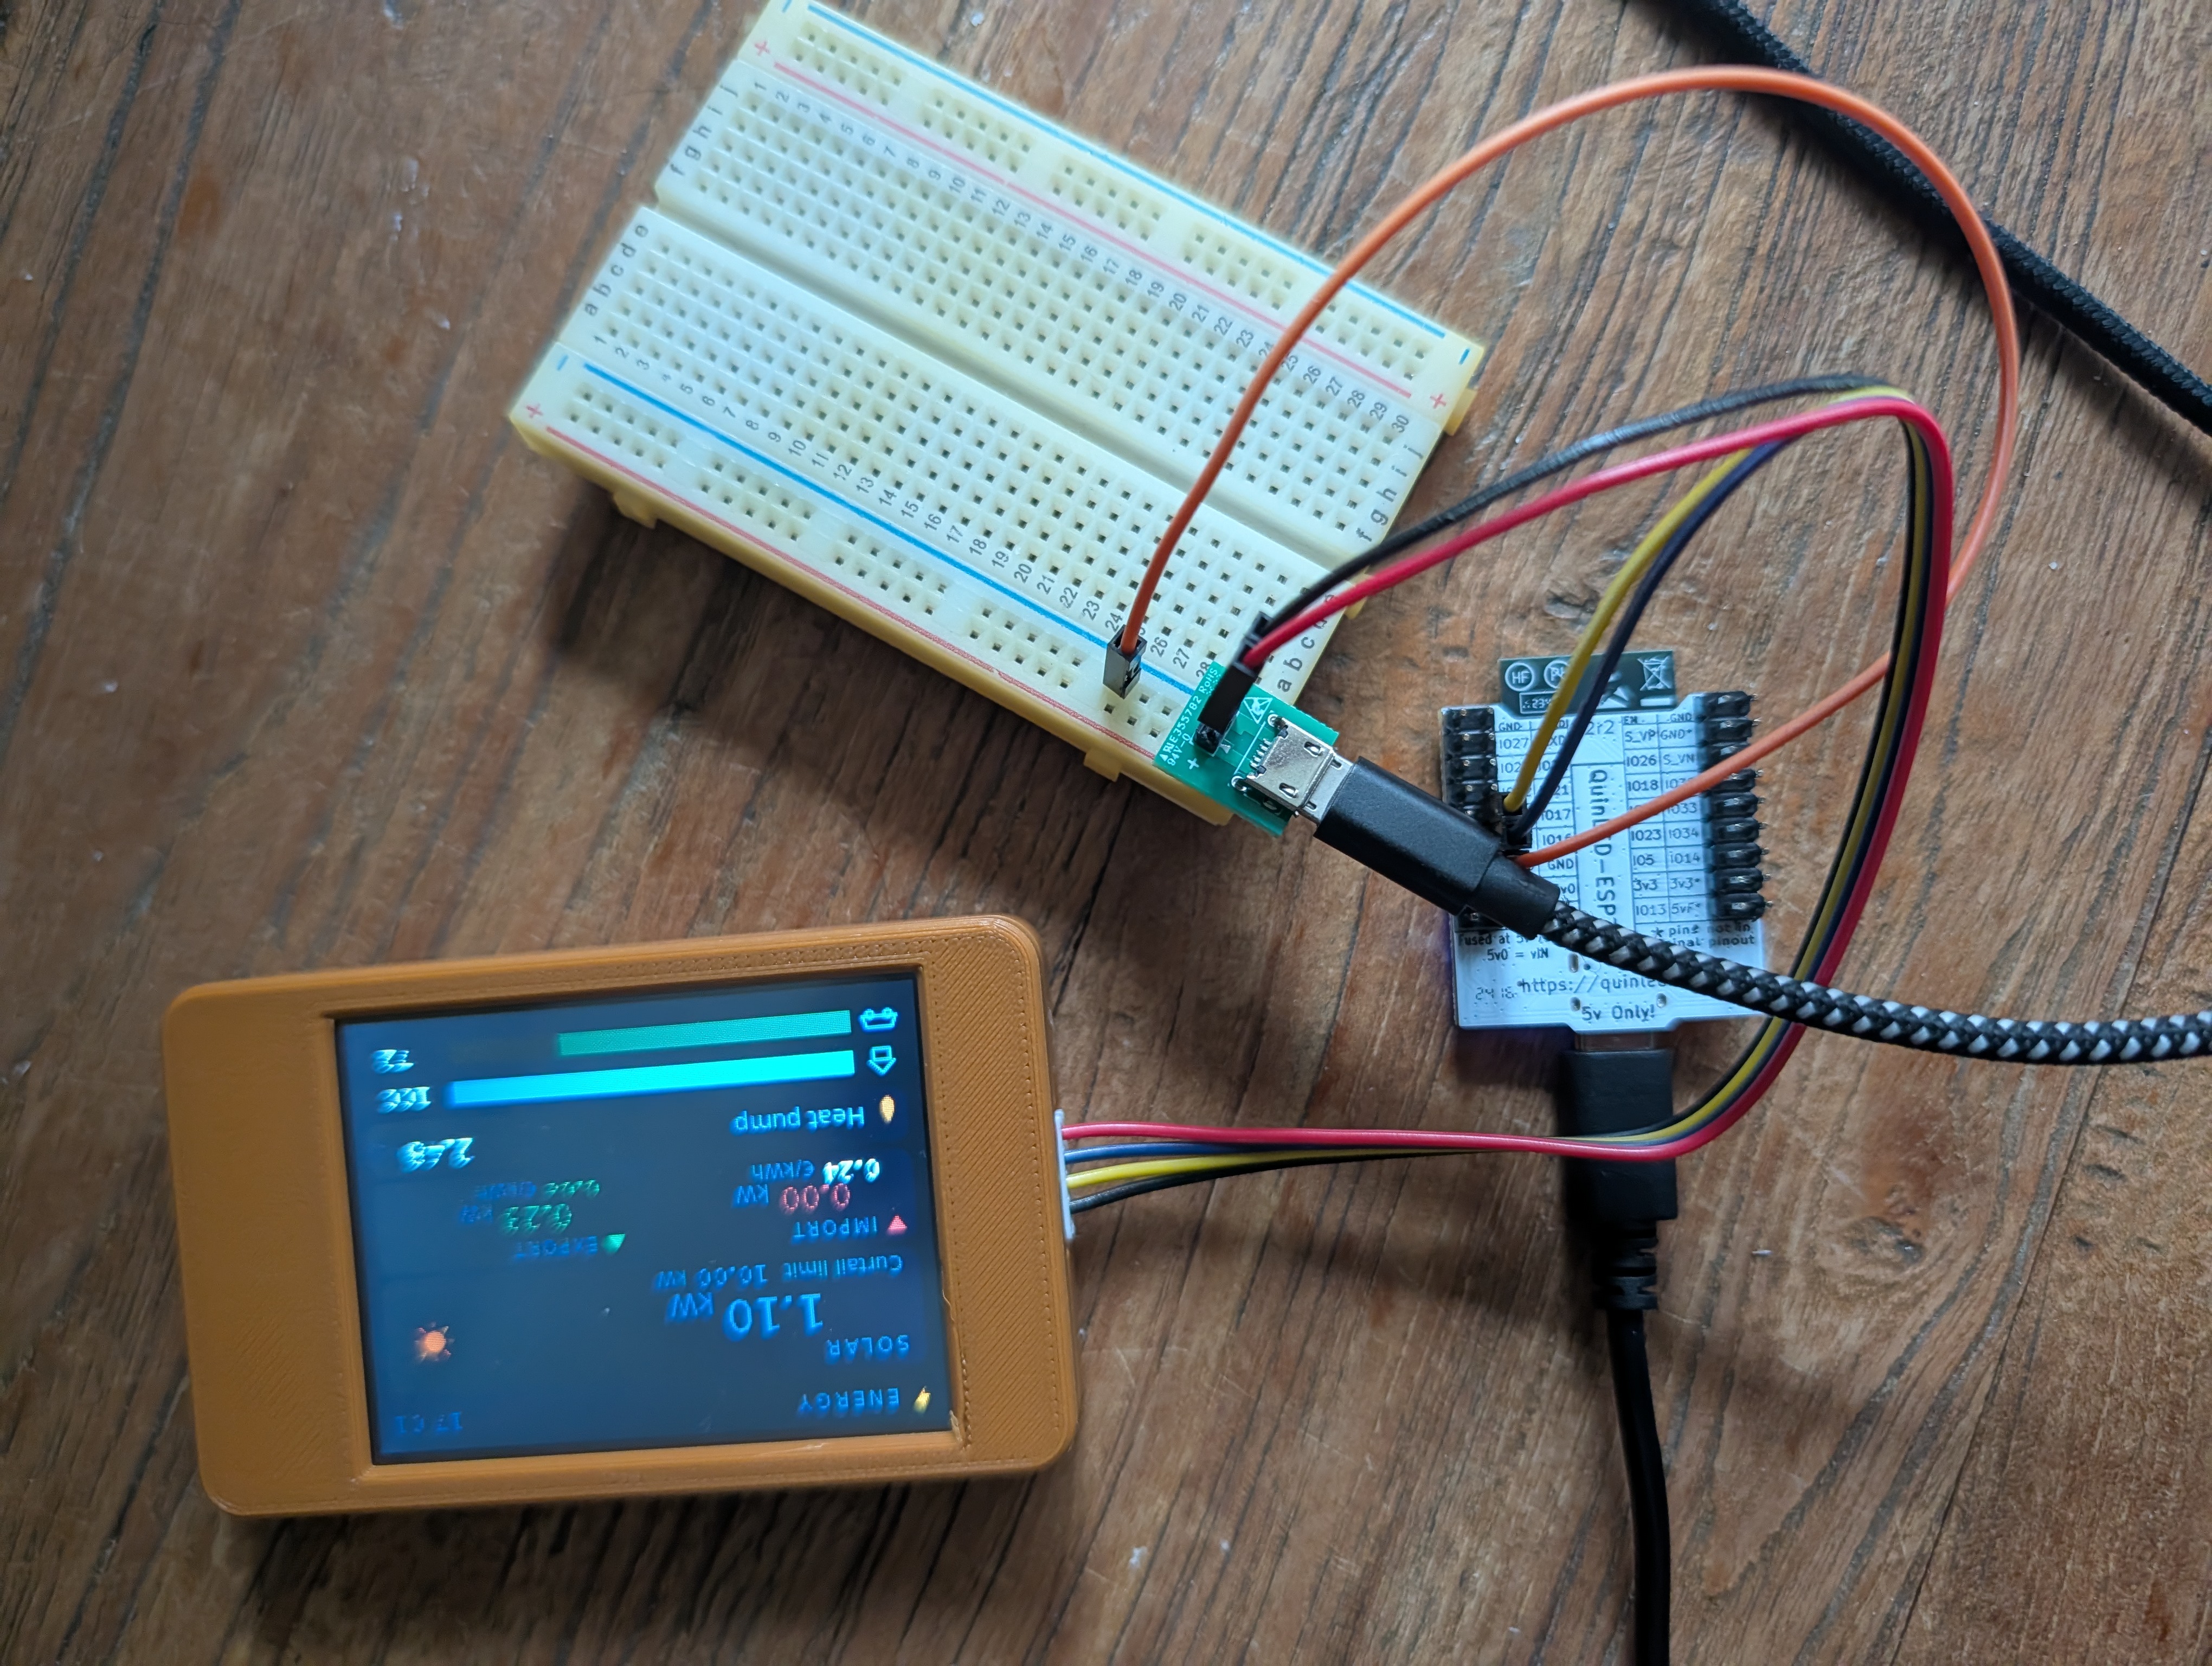
Because the Nextion is a dumb-ish serial display, I also needed an ESP32 to talk to Home Assistant, and I still had a QuinLED-ESP32 waiting for a project 😉.
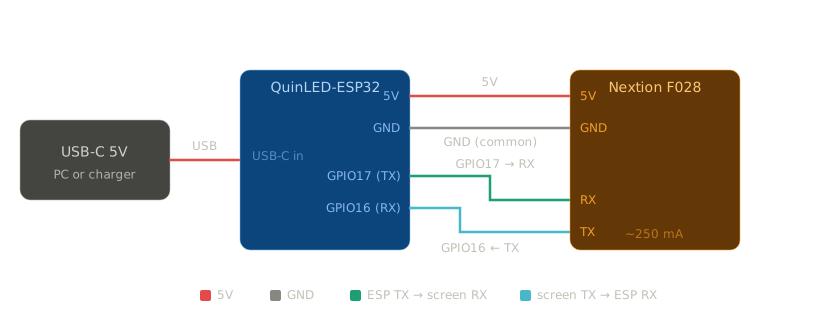
Wiring details
Because the Nextion display uses to much current for the esp to handle, I had to power them both from the source:
Software
As my EMS is powered by Home Assistant, it made a lot of sense to use EspHome. I also needed Nextion Editor to create the UI.
Bringing everything together
Though conversing with Claude.ai I build the full picture of what I needed to make it work.
1. A UI
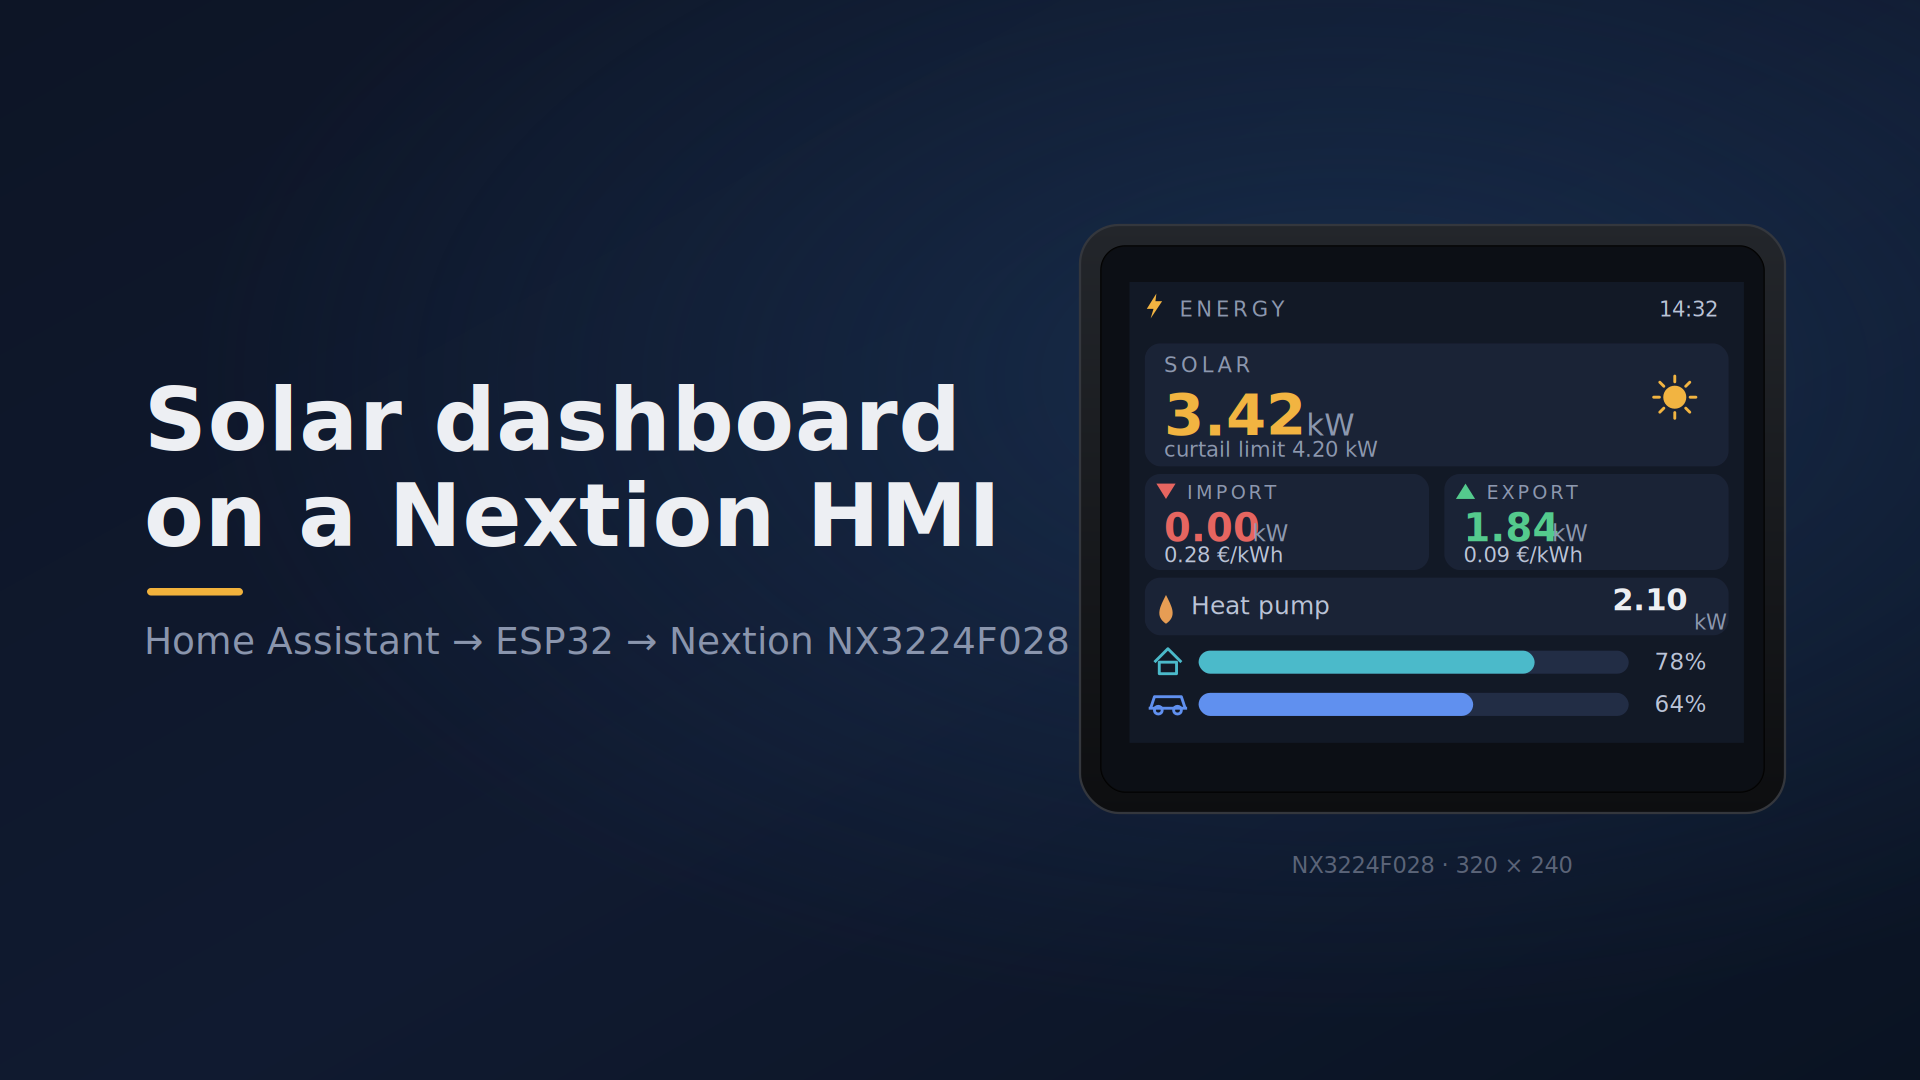
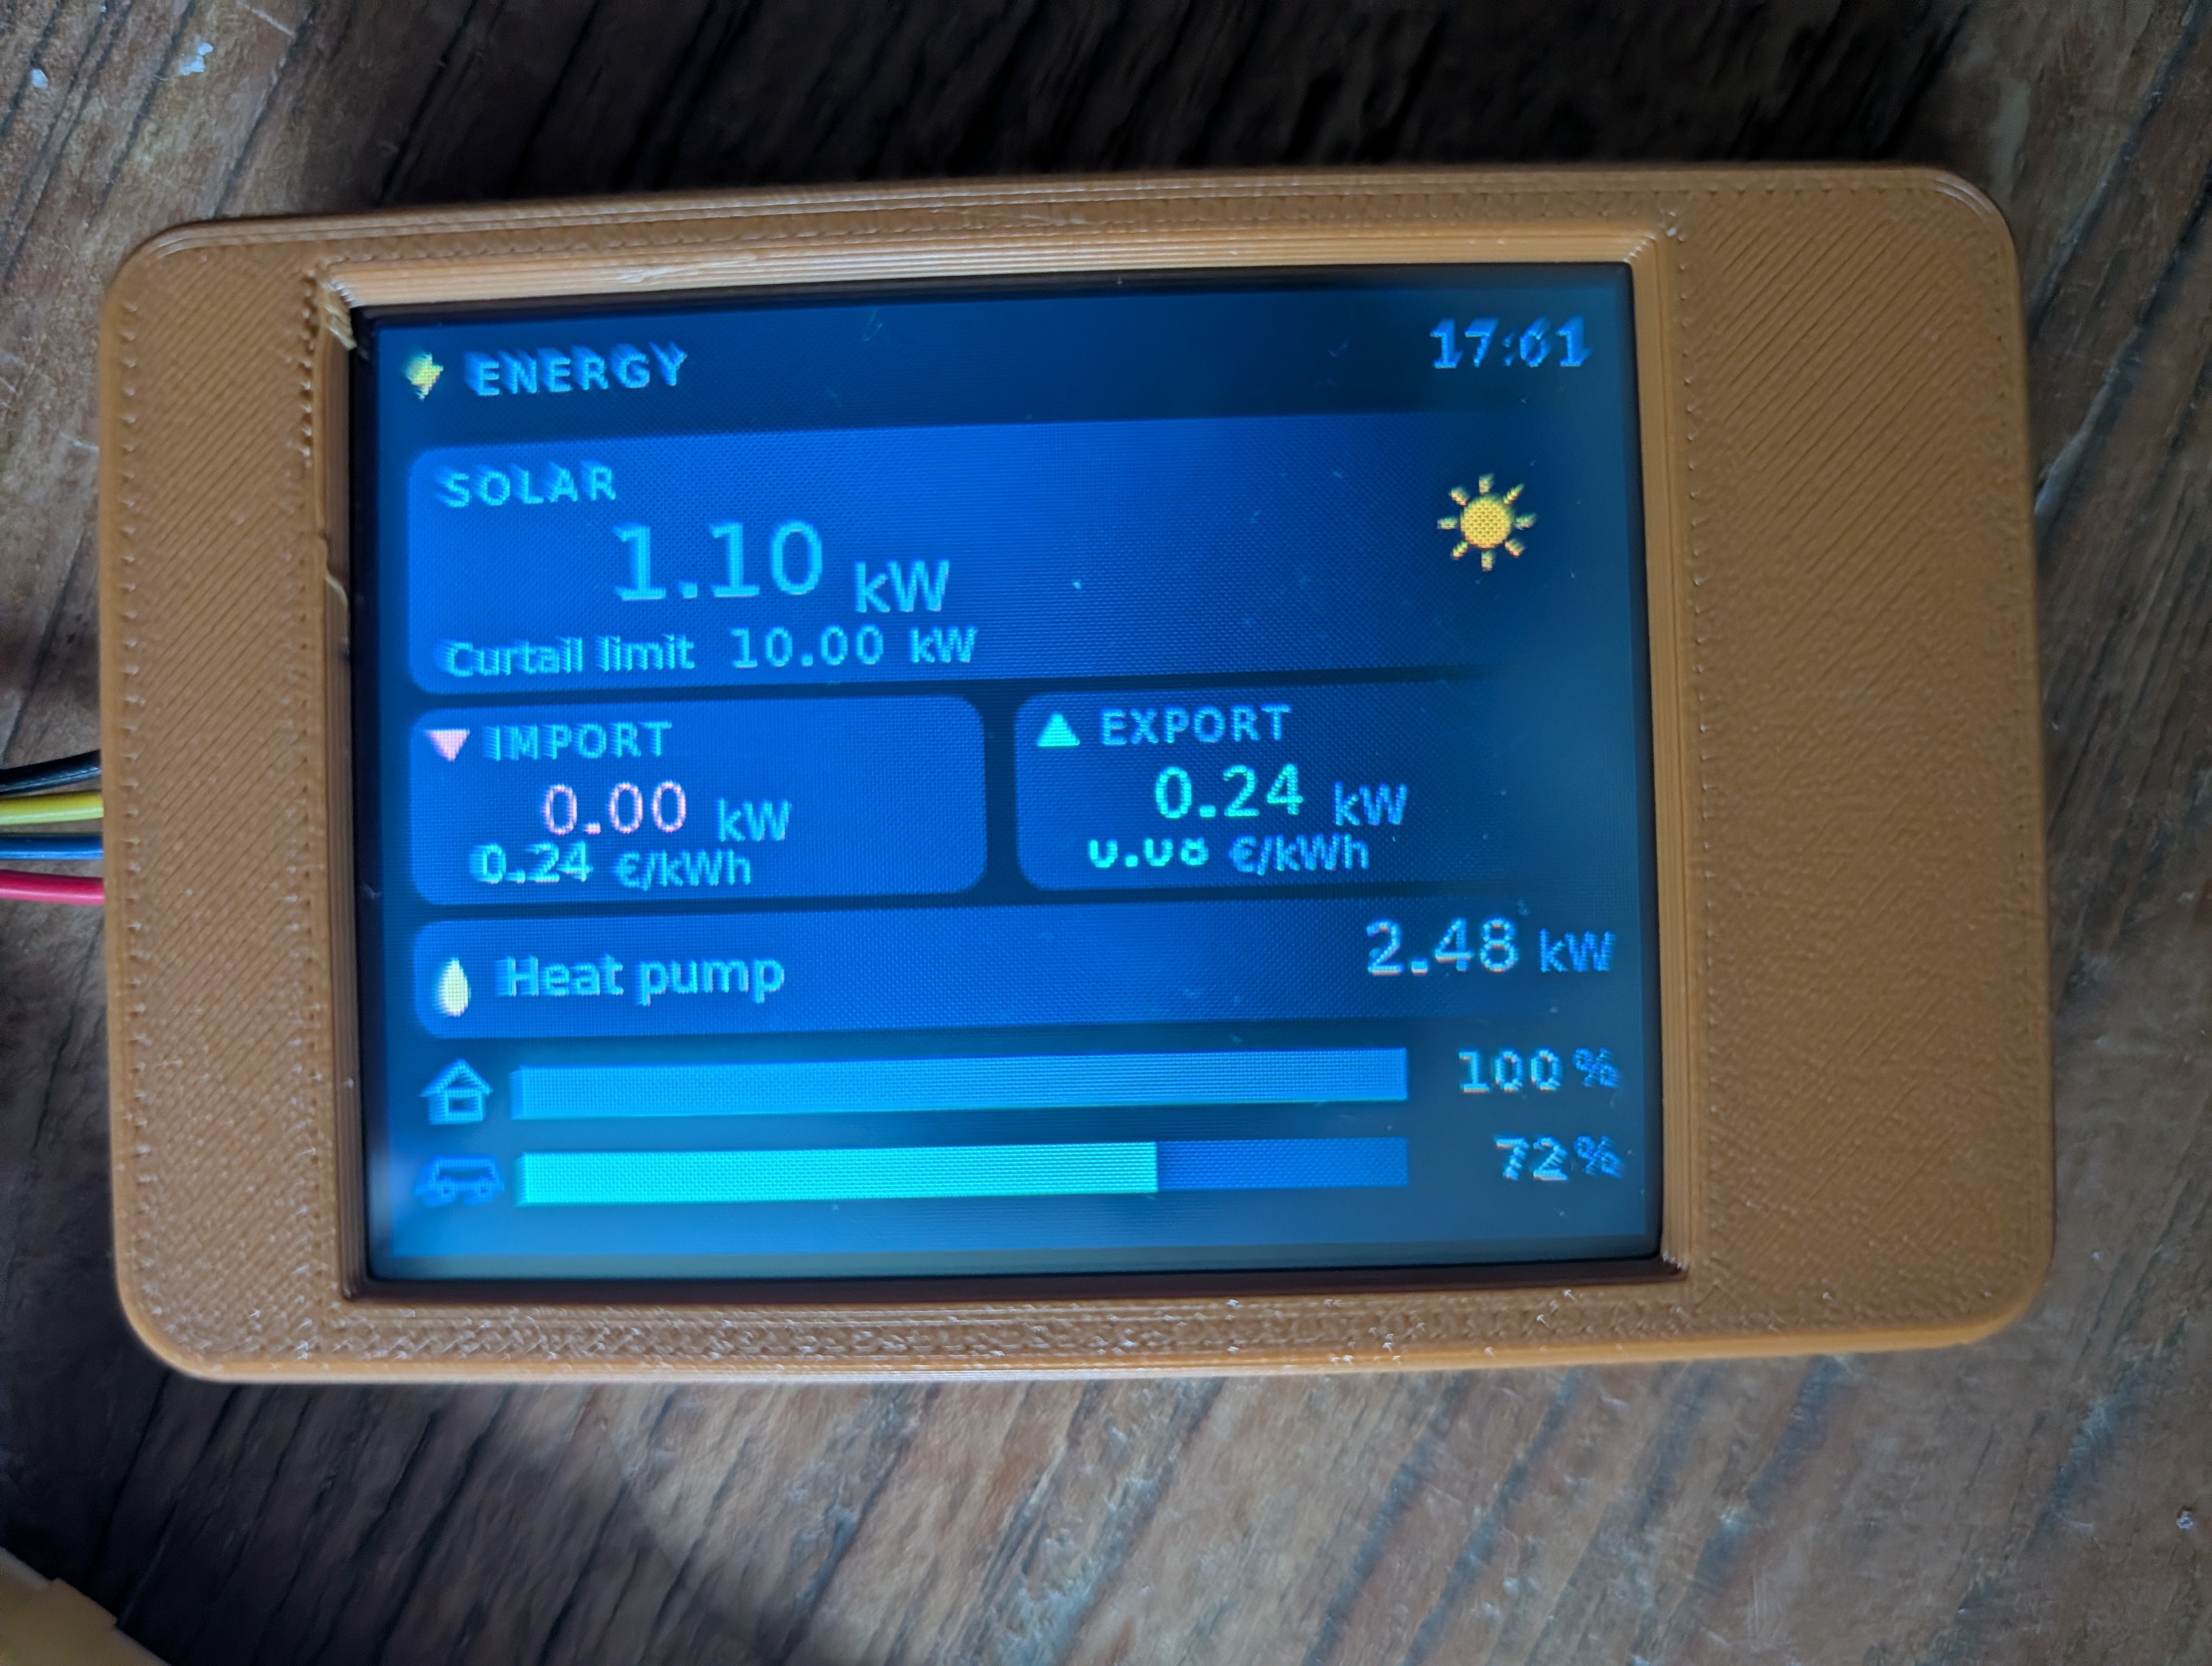
Created this small dashboard that shows everything that I want:
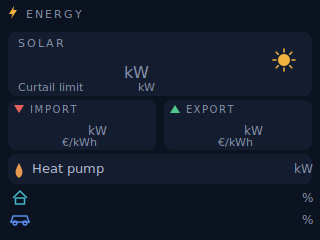
Next I moved to Nextion Editor where I created the .tft file, which contains the background image and UI elements.
2. EspHome
The config that makes my QuinLED-ESP32 connect to and update the UI on screen:
# =============================================================================
# ESPHome config — QuinLED-ESP32 -> Nextion NX3224F028 energy dashboard bridge
# -----------------------------------------------------------------------------
# Wiring:  screen TX -> GPIO16 (ESP RX) | screen RX -> GPIO17 (ESP TX)
#          screen 5V/GND -> breadboard rail (NOT through the QuinLED)
# Note:    components show BARE NUMBERS; units (kW, %, EUR/kWh) live in the
#          background PNG. Font colours (pco) are RGB565 integers.
# =============================================================================

esphome:
  name: energy-display

esp32:
  board: esp32dev
  framework:
    type: arduino          # Nextion TFT upload is most reliable on Arduino

wifi:
  ssid: !secret wifi_ssid
  password: !secret wifi_password

api:
  encryption:
    key: !secret api_key

ota:
  - platform: esphome

logger:
  baud_rate: 0             # free UART0; logs still stream over the API

time:
  - platform: homeassistant
    id: esptime
    on_time:
      - seconds: 0
        then:
          - lambda: |-
              auto t = id(esptime).now();
              if (t.is_valid())
                id(disp).set_component_text("t_clock", t.strftime("%H:%M").c_str());

uart:
  id: nx_uart
  tx_pin: GPIO17           # -> screen RX
  rx_pin: GPIO16           # -> screen TX
  baud_rate: 115200        # must match `bauds=115200` in page0 preinit

display:
  - platform: nextion
    id: disp
    uart_id: nx_uart
    tft_url: http://192.168.0.1:8123/local/dashboard.tft   # your HA LAN IP

button:
  - platform: template
    name: "Flash Nextion TFT"
    entity_category: config
    on_press:
      - lambda: 'id(disp)->upload_tft();'

sensor:
  # --- power sensors: W -> kW, 2 decimals --------------------------------------
  - platform: homeassistant
    id: s_solar
    entity_id: sensor.solar_total_power
    on_value:
      - lambda: |-
          if (isnan(x)) id(disp).set_component_text("t_solar", "--");
          else id(disp).set_component_text_printf("t_solar", "%.2f", x / 1000.0);

  - platform: homeassistant
    id: s_curtail
    entity_id: sensor.solar_injection_load_balancing
    on_value:
      - lambda: |-
          if (isnan(x)) id(disp).set_component_text("t_curtail", "--");
          else id(disp).set_component_text_printf("t_curtail", "%.2f", x / 1000.0);

  - platform: homeassistant
    id: s_import
    entity_id: sensor.electricity_meter_power_consumption
    on_value:
      - lambda: |-
          if (isnan(x)) id(disp).set_component_text("t_import", "--");
          else id(disp).set_component_text_printf("t_import", "%.2f", x / 1000.0);

  - platform: homeassistant
    id: s_export
    entity_id: sensor.electricity_meter_power_production
    on_value:
      - lambda: |-
          if (isnan(x)) id(disp).set_component_text("t_export", "--");
          else id(disp).set_component_text_printf("t_export", "%.2f", x / 1000.0);

  - platform: homeassistant
    id: s_heat
    entity_id: sensor.luxtronik_331012_05_current_heat_output
    on_value:
      - lambda: |-
          if (isnan(x)) id(disp).set_component_text("t_heat", "--");
          else id(disp).set_component_text_printf("t_heat", "%.2f", x / 1000.0);

  # --- prices: EUR/kWh, 2 decimals, dynamic colour ----------------------------
  - platform: homeassistant
    id: s_pimp
    entity_id: sensor.ecopower_energi_consumption_price
    on_value:
      - lambda: |-
          if (isnan(x)) { id(disp).set_component_text("t_pimp", "--"); }
          else {
            id(disp).set_component_text_printf("t_pimp", "%.2f", x);
            id(disp).send_command_printf("t_pimp.pco=%d",
              x < 0 ? 20049 : (x > 0.30 ? 58123 : 65535));
          }

  - platform: homeassistant
    id: s_pexp
    entity_id: sensor.ecopower_energi_injection_price
    on_value:
      - lambda: |-
          if (isnan(x)) { id(disp).set_component_text("t_pexp", "--"); }
          else {
            id(disp).set_component_text_printf("t_pexp", "%.2f", x);
            id(disp).send_command_printf("t_pexp.pco=%d", x < 0 ? 58123 : 20049);
          }

  # --- battery SoC: % -> progress bar (int) + number text ---------------------
  - platform: homeassistant
    id: s_home_soc
    entity_id: sensor.indevolt_cms_sf2000_battery_soc
    on_value:
      - lambda: |-
          if (isnan(x)) { id(disp).set_component_text("t_home", "--"); }
          else {
            id(disp).set_component_value("j_home", (int) x);
            id(disp).set_component_text_printf("t_home", "%.0f", x);
          }

  - platform: homeassistant
    id: s_car_soc
    entity_id: sensor.volvo_ex40_battery
    on_value:
      - lambda: |-
          if (isnan(x)) { id(disp).set_component_text("t_car", "--"); }
          else {
            id(disp).set_component_value("j_car", (int) x);
            id(disp).set_component_text_printf("t_car", "%.0f", x);
          }
3. Home Assistant
The dashboard.tft file is uploaded in the config/www folder of Home Assistant, to make it easy for the esp to pull and write it to the Nextion display.
4. The screen case
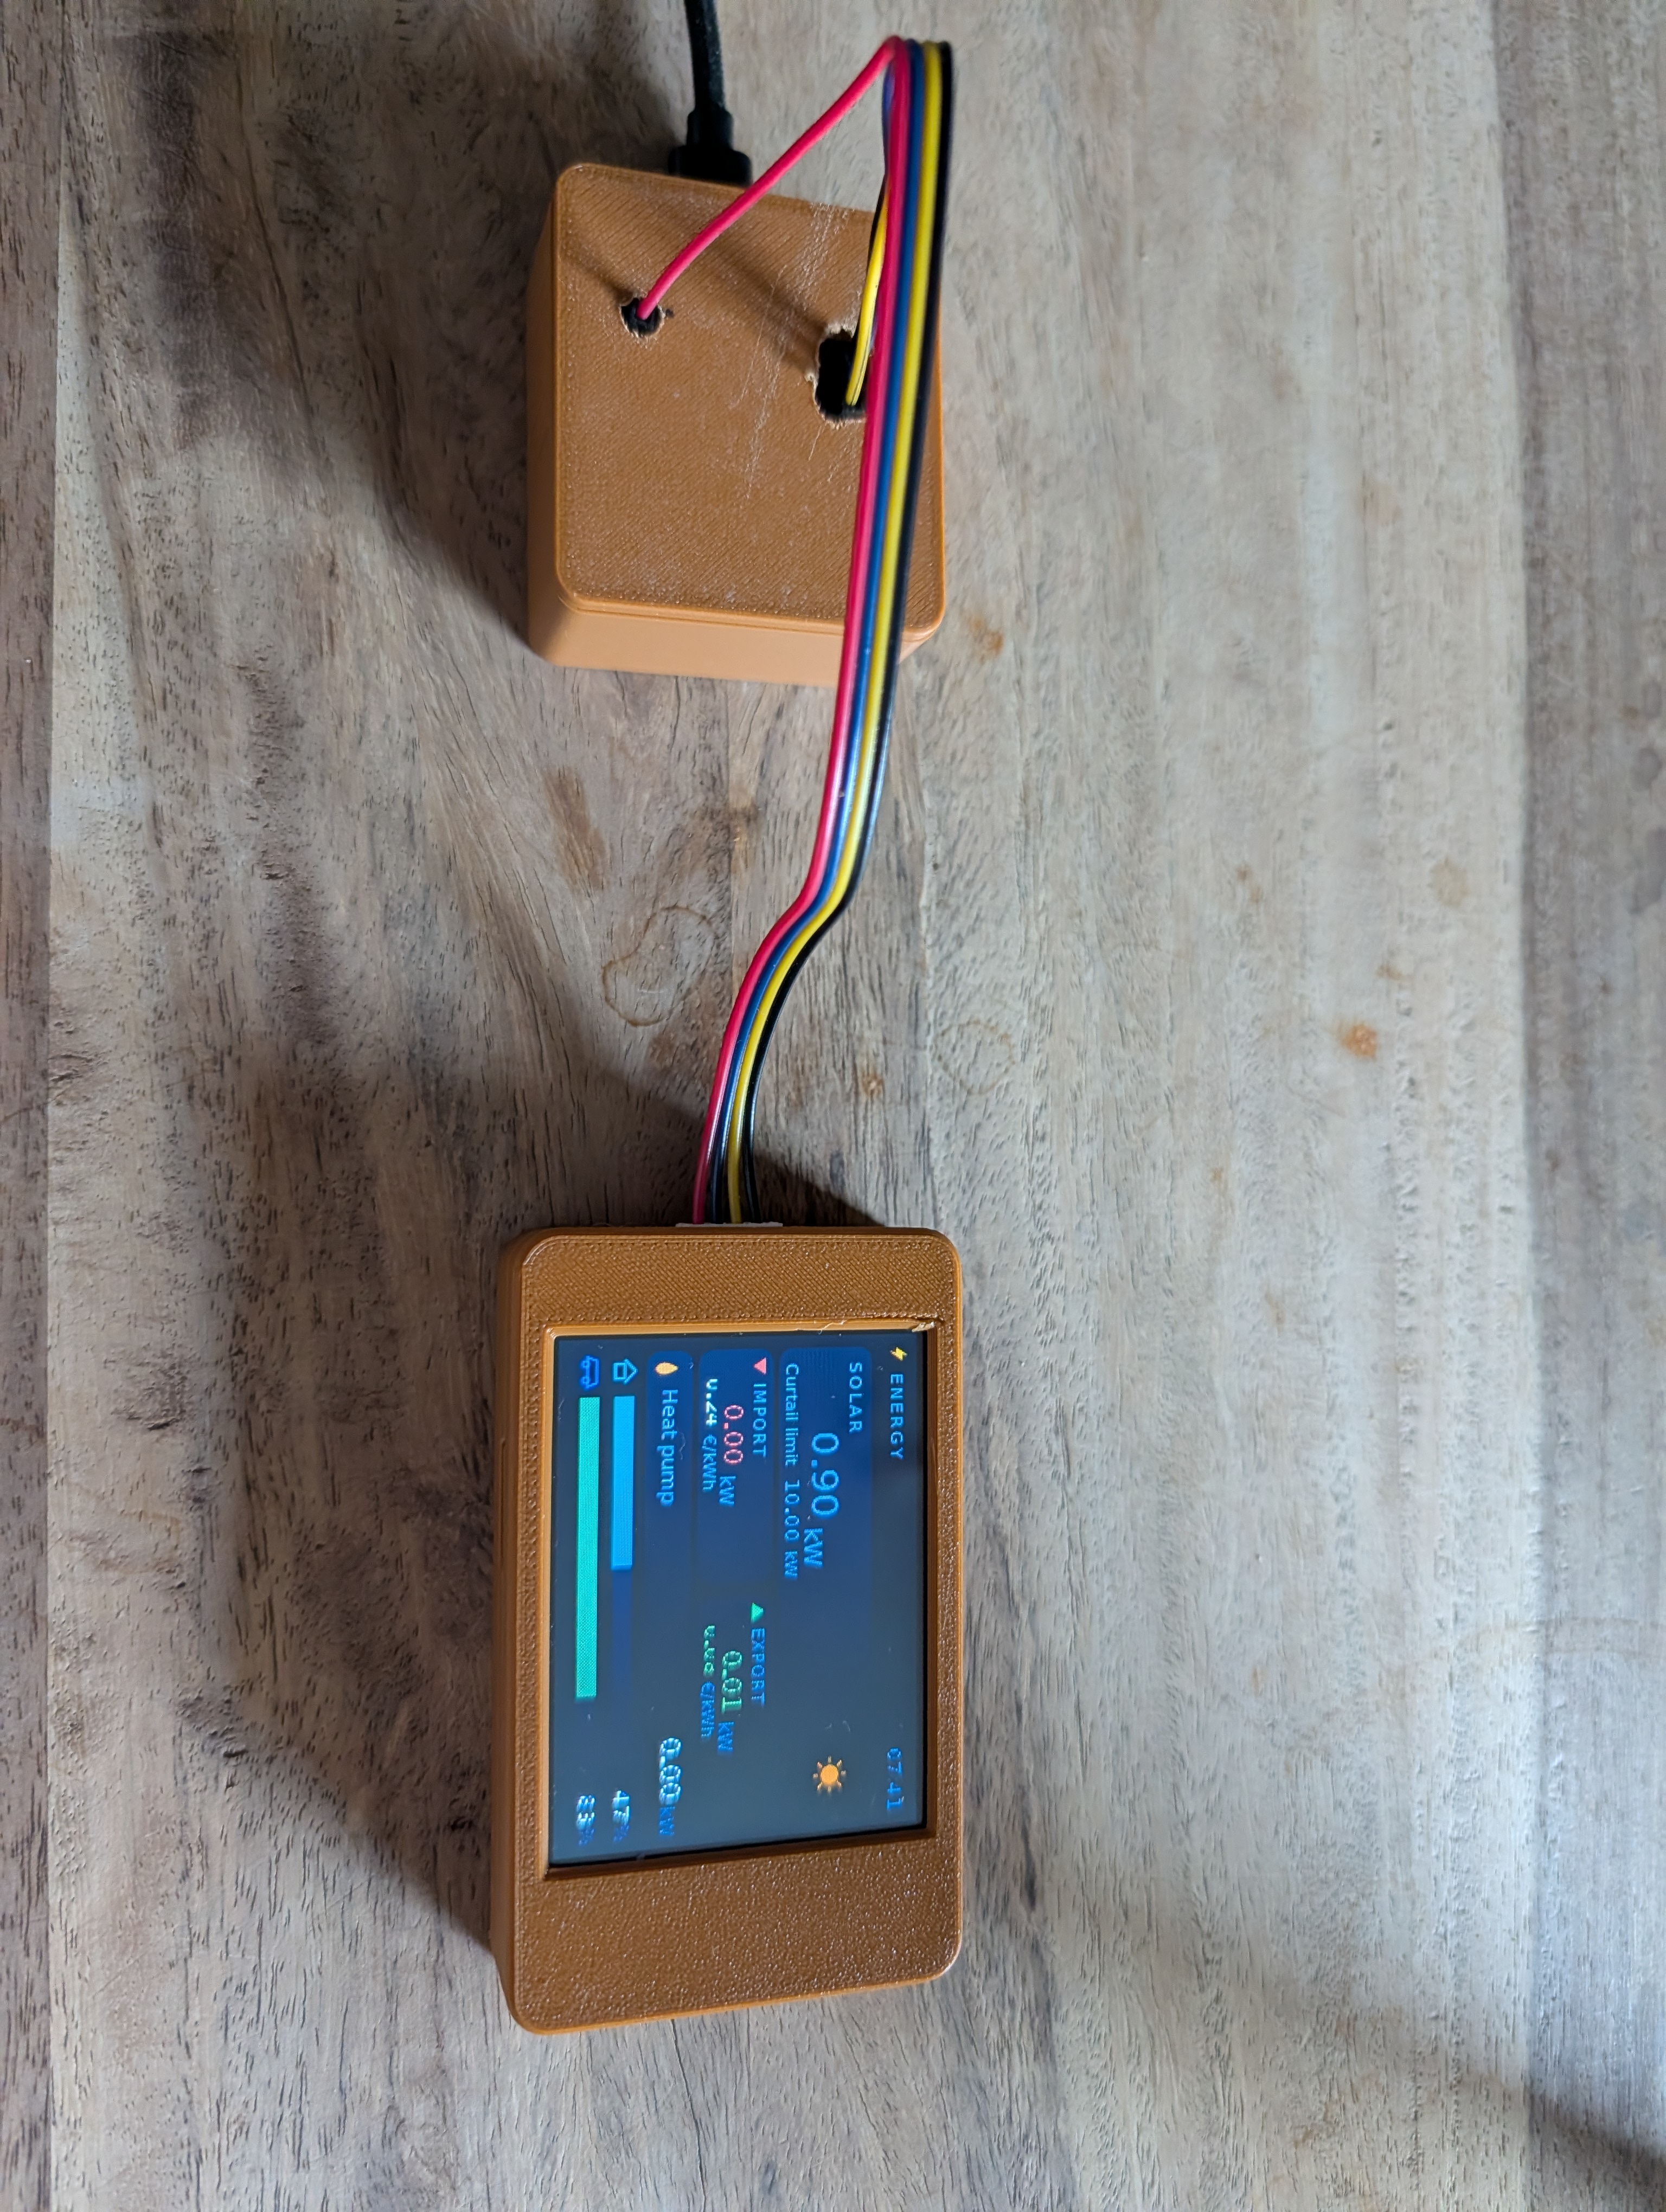
To finish it up, I did print a 3d case.
The result
Build 2 — ESP32-2432S028R (Cheap Yellow Display)
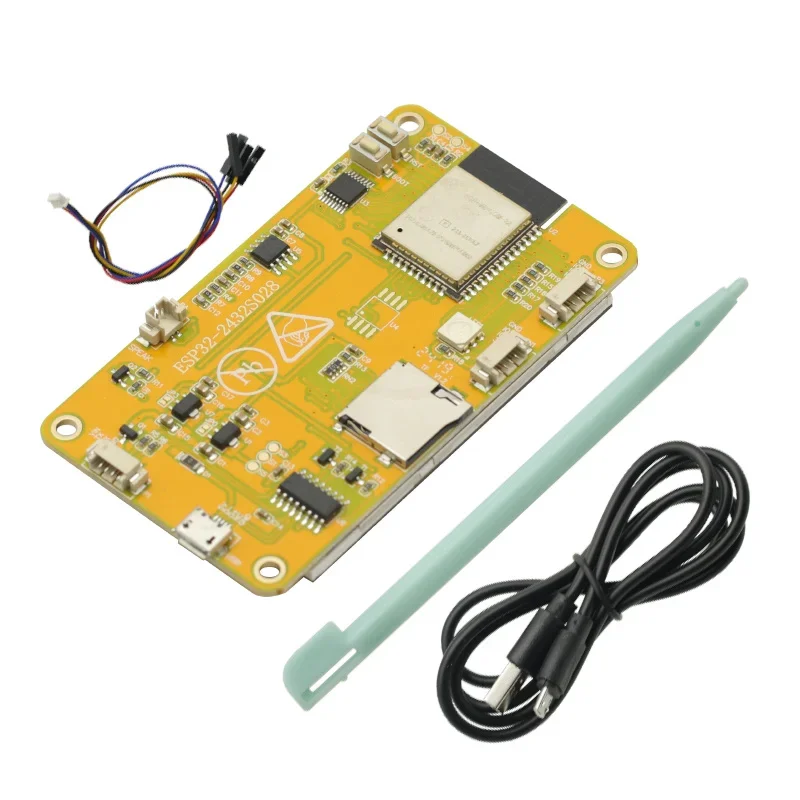
After the Nextion build I finally got my hands on the board I had been curious about from the start: a 2.8" ESP32-2432S028R (240×320). This is the Cheap Yellow Display — so named for its unmistakable yellow PCB — and it's really great!
The big difference with the Nextion: the ESP32 is on the board. There's no separate microcontroller, no serial bridge, no juggling power rails — the same chip that talks to Home Assistant also drives the TFT. It's an all-in-one package with a 2.8" ILI9341 screen, resistive touch, a microSD slot and an RGB LED, for not much money.
Hardware
One USB cable, one board. That's the whole bill of materials — a refreshing change from wiring a display, an ESP32 and an external supply together on a breadboard like in Build 1.
Software (ESPHome + LVGL)
This is where things got fun. Because the CYD is a full ESP32, I could finally use ESPHome's LVGL component to build the UI directly in YAML — no separate UI editor, no .tft file to flash. The whole dashboard, layout and live data, lives in a single ESPHome config and updates instantly on esphome run.
LVGL gives you a proper widget toolkit — labels, bars, buttons — and ESPHome wires Home Assistant sensors straight onto those widgets. The same solar / battery / heat-pump / dynamic-price values from Build 1, but now rendered by the same device that fetches them.
Having the touchscreen and a real GUI toolkit on hand, I went further than the single-screen Nextion build: the home page is a grid of icon tiles, and tapping a tile slides in a detailed screen (Overview, Solar, Smart meter, EV, Thermostat, Battery). The full config is ~1400 lines, so here's just the shape of it — the minimal display block (LVGL owns the pixels), one hub tile, and the data-binding pattern. The neat parallel with Build 1: instead of every sensor writing to the screen directly, each one calls a single refresh_display script that pushes values into the widgets — including the same cheap-is-green / pricey-is-red colour trick the Nextion did with pco.
# =============================================================================
# ESPHome config — CYD (ESP32-2432S028R, ILI9341) energy dashboard — LVGL build
# Excerpt: a home hub of icon tiles, each opening a detail screen. Shown here:
# the display/LVGL setup, one tile widget, and how HA values reach the widgets.
# =============================================================================

esphome:
  name: elias-ems-energy-display-cyd

esp32:
  board: esp32dev
  framework:
    type: arduino

# SPI buses: the display and the touch controller sit on separate buses.
spi:
  - { id: tft, clk_pin: GPIO14, mosi_pin: GPIO13 }
  - { id: touch_spi, clk_pin: GPIO25, mosi_pin: GPIO32, miso_pin: GPIO39 }

# The display block stays minimal — LVGL owns the pixels.
display:
  - platform: mipi_spi
    model: ESP32-2432S028      # built-in profile for this exact CYD board
    spi_id: tft
    auto_clear_enabled: false  # LVGL owns the framebuffer
    update_interval: never     # LVGL flushes on change, not on a timer
    id: disp

lvgl:
  buffer_size: 25%             # base CYD has no PSRAM -> 25% chunked buffer
  rotation: 180                # portrait, 240x320
  bg_color: 0x10131A
  pages:
    - id: page_home
      widgets:
        # One hub tile: icon + big live value + caption. Tap -> Solar screen.
        - button:
            x: 124
            y: 64
            width: 108
            height: 78
            on_short_click:
              - lvgl.page.show: { id: page_solar, animation: OUT_LEFT, time: 250ms }
            widgets:
              - label: { align: TOP_LEFT, x: 4, y: 5, text: "\U000F0599", text_color: 0xF7CB15, text_font: mdi_small }  # mdi-weather-sunny
              - label: { id: v_tile_solar, align: TOP_RIGHT, text: "--", text_color: 0xF7CB15, text_font: roboto28 }
              - label: { align: BOTTOM_MID, y: -6, text: "Solar", text_color: 0x9AA0A6, text_font: roboto13 }
    # ...page_solar, page_grid, page_ev, page_heat, page_battery follow the same shape

# Every Home Assistant entity just calls one script — the single source of truth.
sensor:
  - { platform: homeassistant, id: s_pimp, entity_id: sensor.ecopower_energi_consumption_price,
      internal: true, on_value: { then: { script.execute: refresh_display } } }
  # ...~50 more entities, all triggering refresh_display

# refresh_display reads each entity's state and pushes it into its widget. The
# dynamic colour is the LVGL twin of the Nextion's pco trick in build 1.
script:
  - id: refresh_display
    then:
      - lvgl.label.update:
          id: v_buy
          text: !lambda 'float v = id(s_pimp).state; return isnan(v) ? std::string("--") : str_sprintf("%.3f EUR", v);'
          text_color: !lambda |-
            float v = id(s_pimp).state;
            if (isnan(v)) return lv_color_hex(0x9AA0A6);
            if (v < 0)    return lv_color_hex(0x00C878);   // paid to consume -> green
            if (v > 0.30) return lv_color_hex(0xE65A3C);   // expensive -> red
            return lv_color_hex(0xECEEF0);
      # ...one lvgl.*.update per widget
The result